If you happen to follow my sporadic posting on Instagram, you already know that we are in the process of making over a play kitchen for the girls’ Christmas gift. It is almost complete, and I am so excited about how everything is coming together! I’ve even rearranged my office to clear up some space for a combination office/playroom with a designated space for the girls to play. I. Can’t. Wait.
In the meantime, I have spent hours, and I mean, pathetically, hours, scouring the internet for play food. It’s a bit overwhelming, and crazy hard to find non-plastic pieces that are both budget friendly and visually pleasing, but I finally felt satisfied that we had a good start to what will likely be a growing collection of food and accessories for a tiny kitchen. Then I walked into TJ Maxx, and came across this Melissa and Doug wooden cookie set for $14.
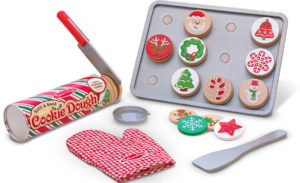
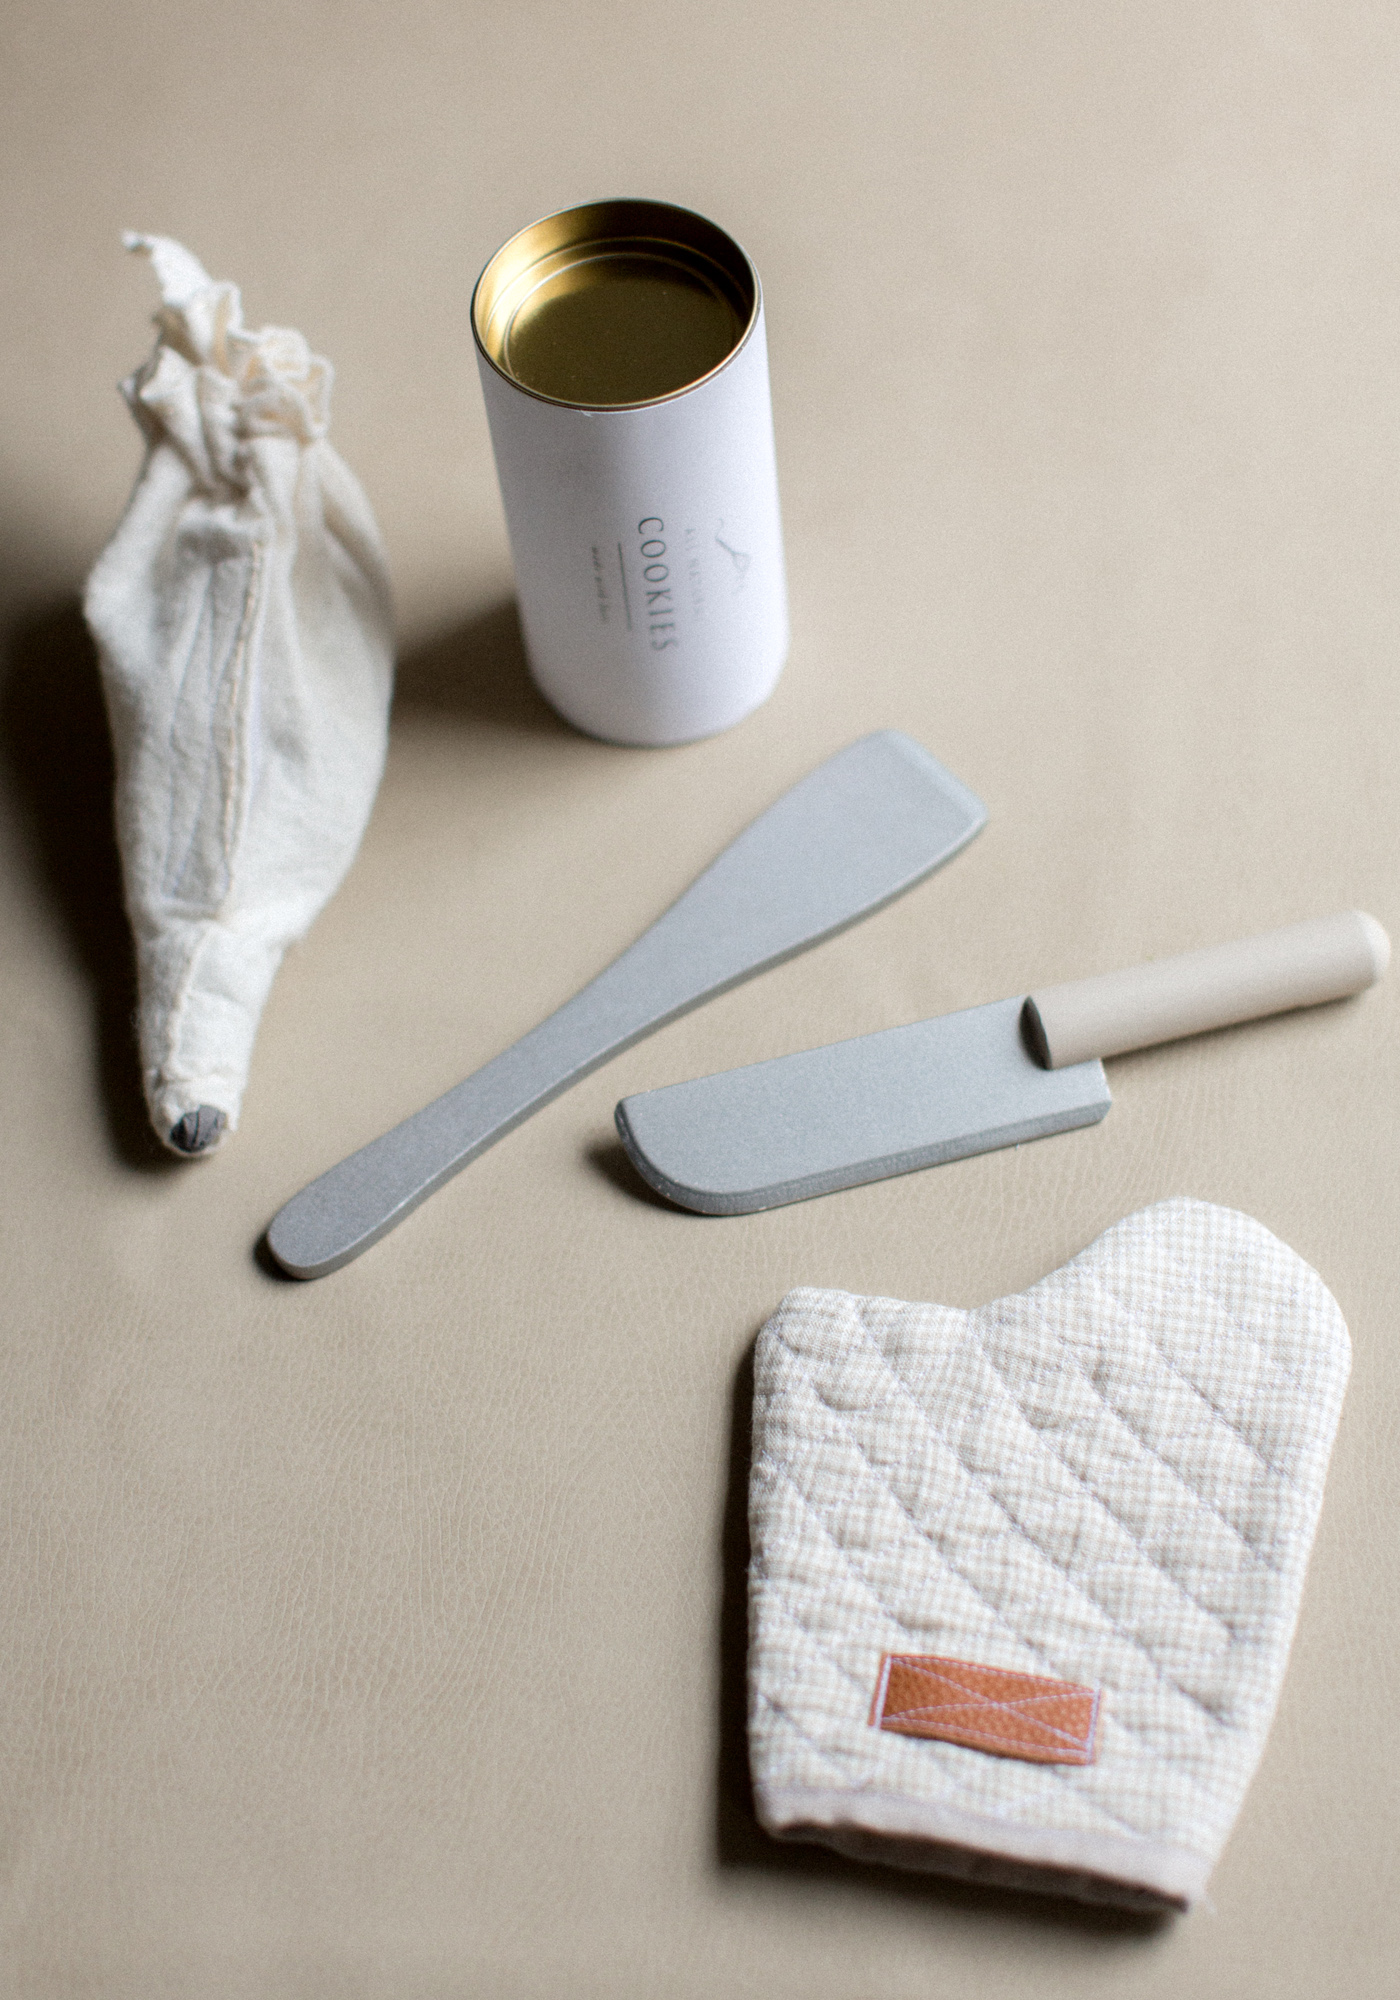
What I saw was potential. Other than having a lot going on visually, I don’t hate this set as-is. But I knew that a fairly simple and straight-forward makeover could transform this “eh” set of cookies into something truly beautiful. I loved that it was wooden. I loved the “cutting” option, and am quite certain one of my daughters in particular will enjoy that as well. Knowing I could pull this off with supplies I already have on hand clinched the deal. Alas, this is currently the cookie set that is wrapped under our tree, waiting to be opened:
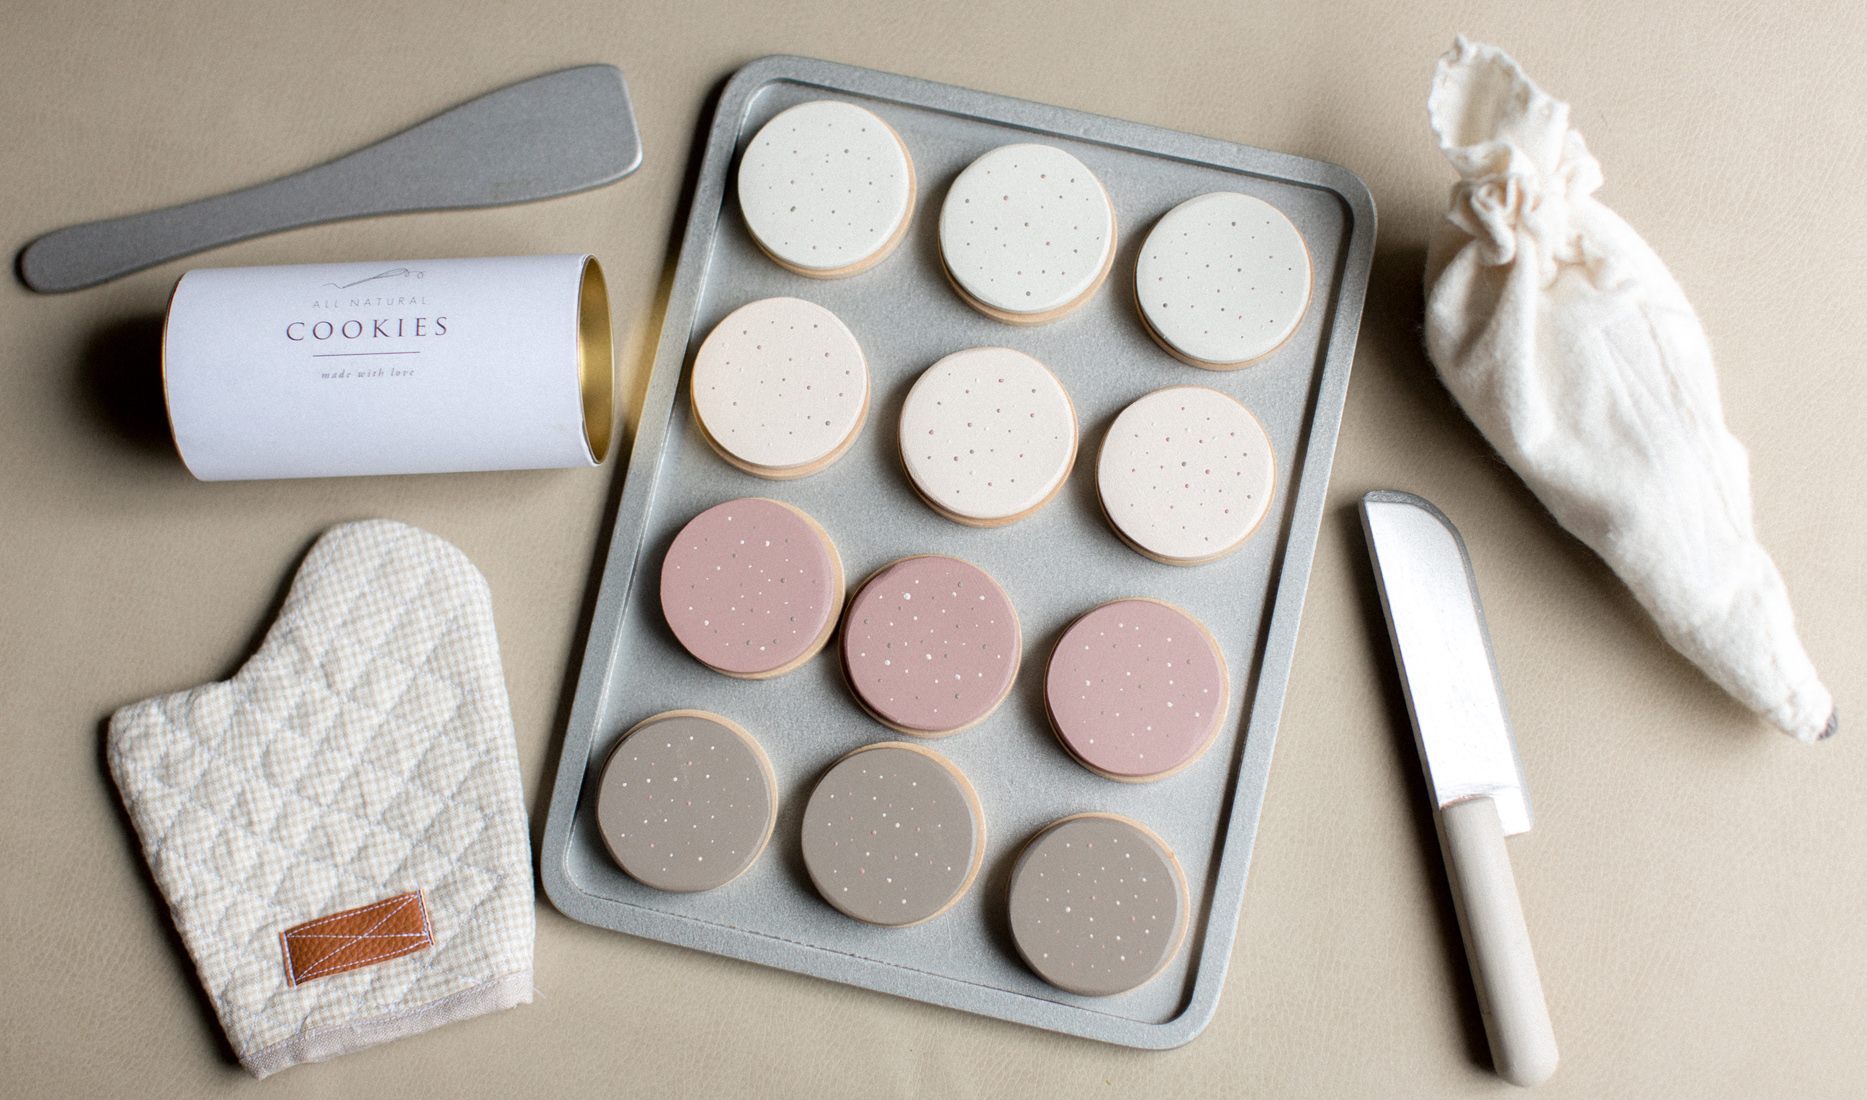
I’m so happy with how it turned out! Of course, I neglected to take photos of the process (though I’m sure you can imagine sanded pieces of wood). Anyway, here is a step-by-step breakdown of what was involved in the transformation…
01 :: WOOD PIECES
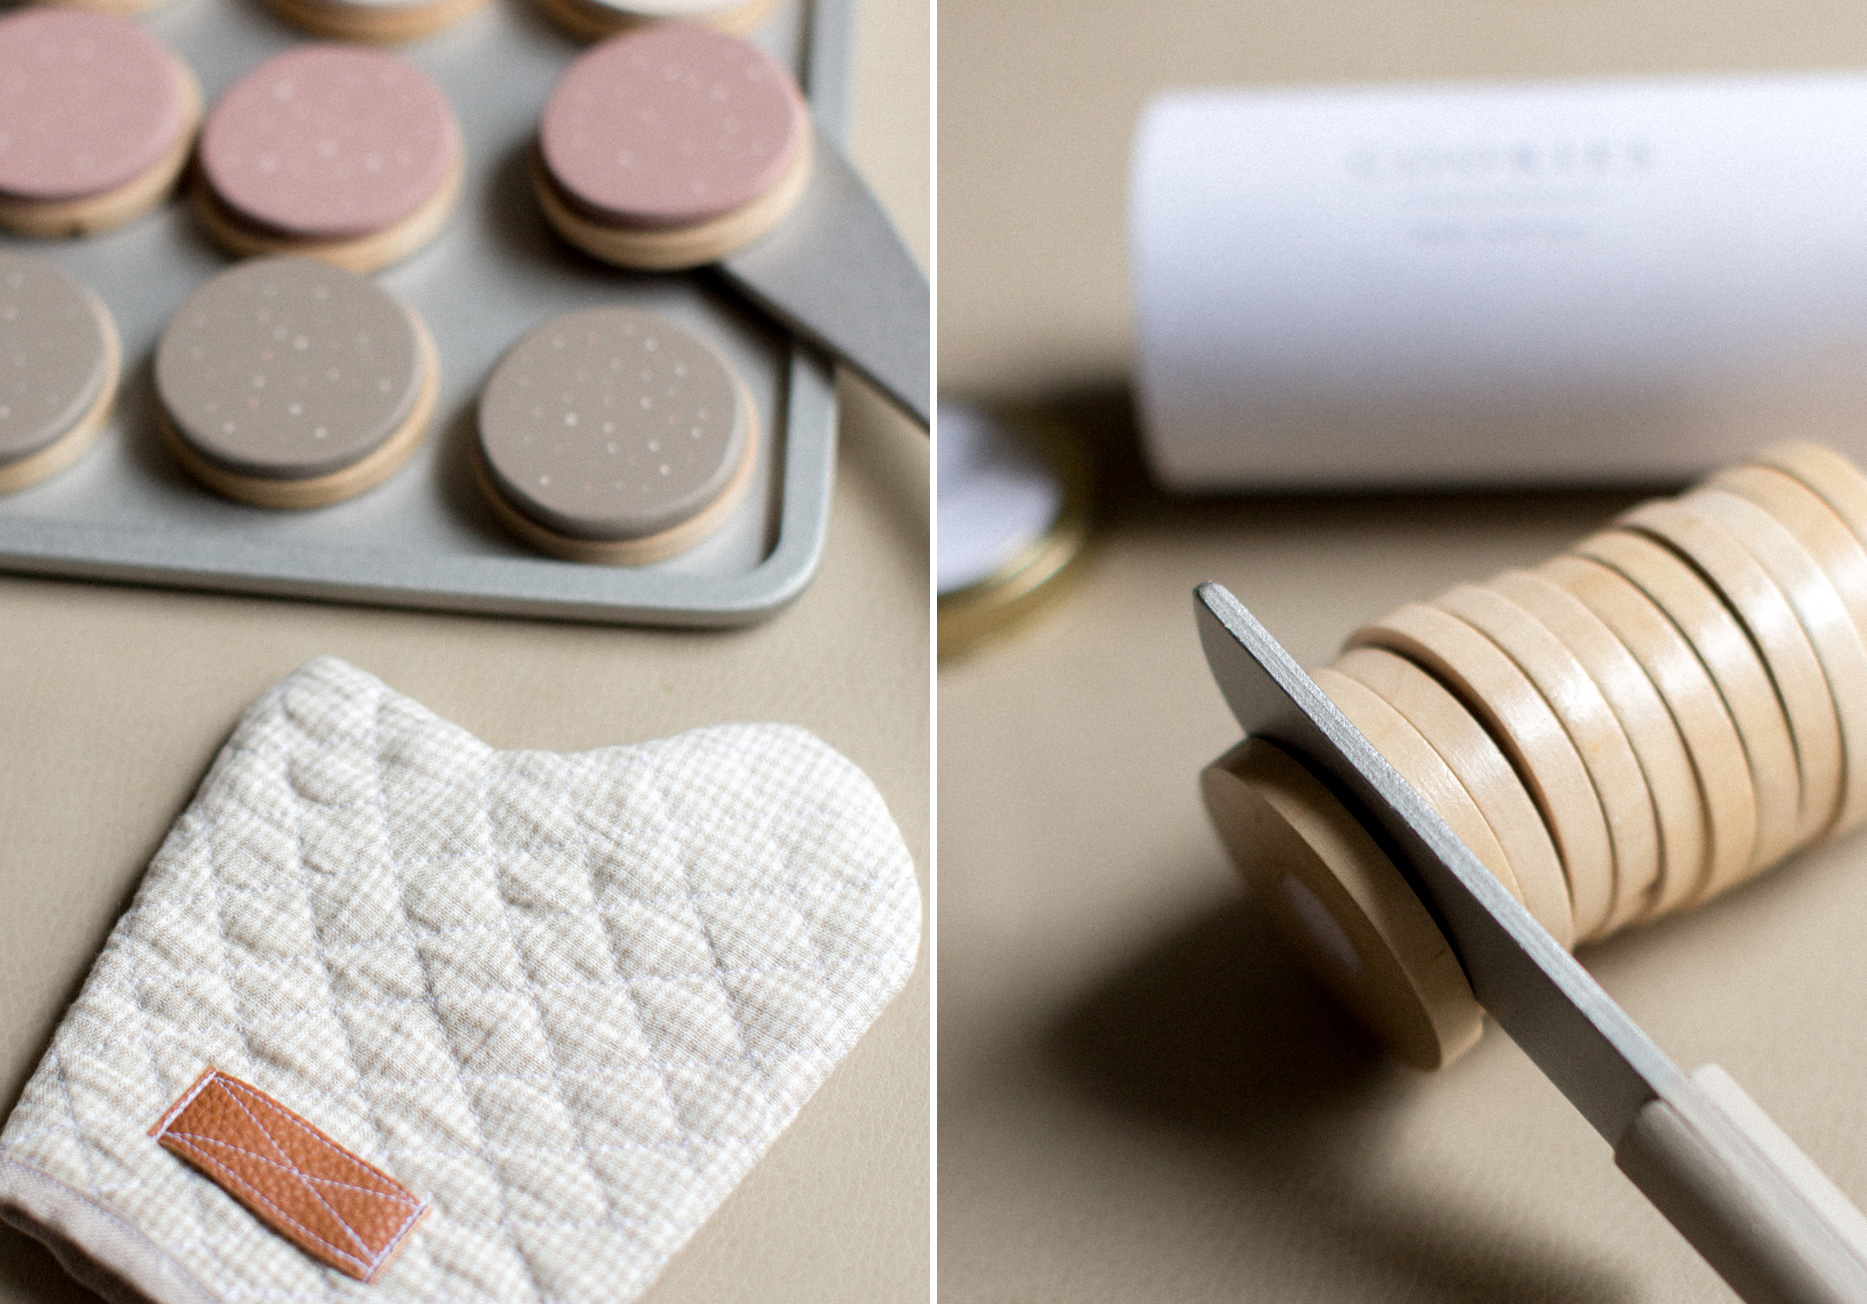
Sand
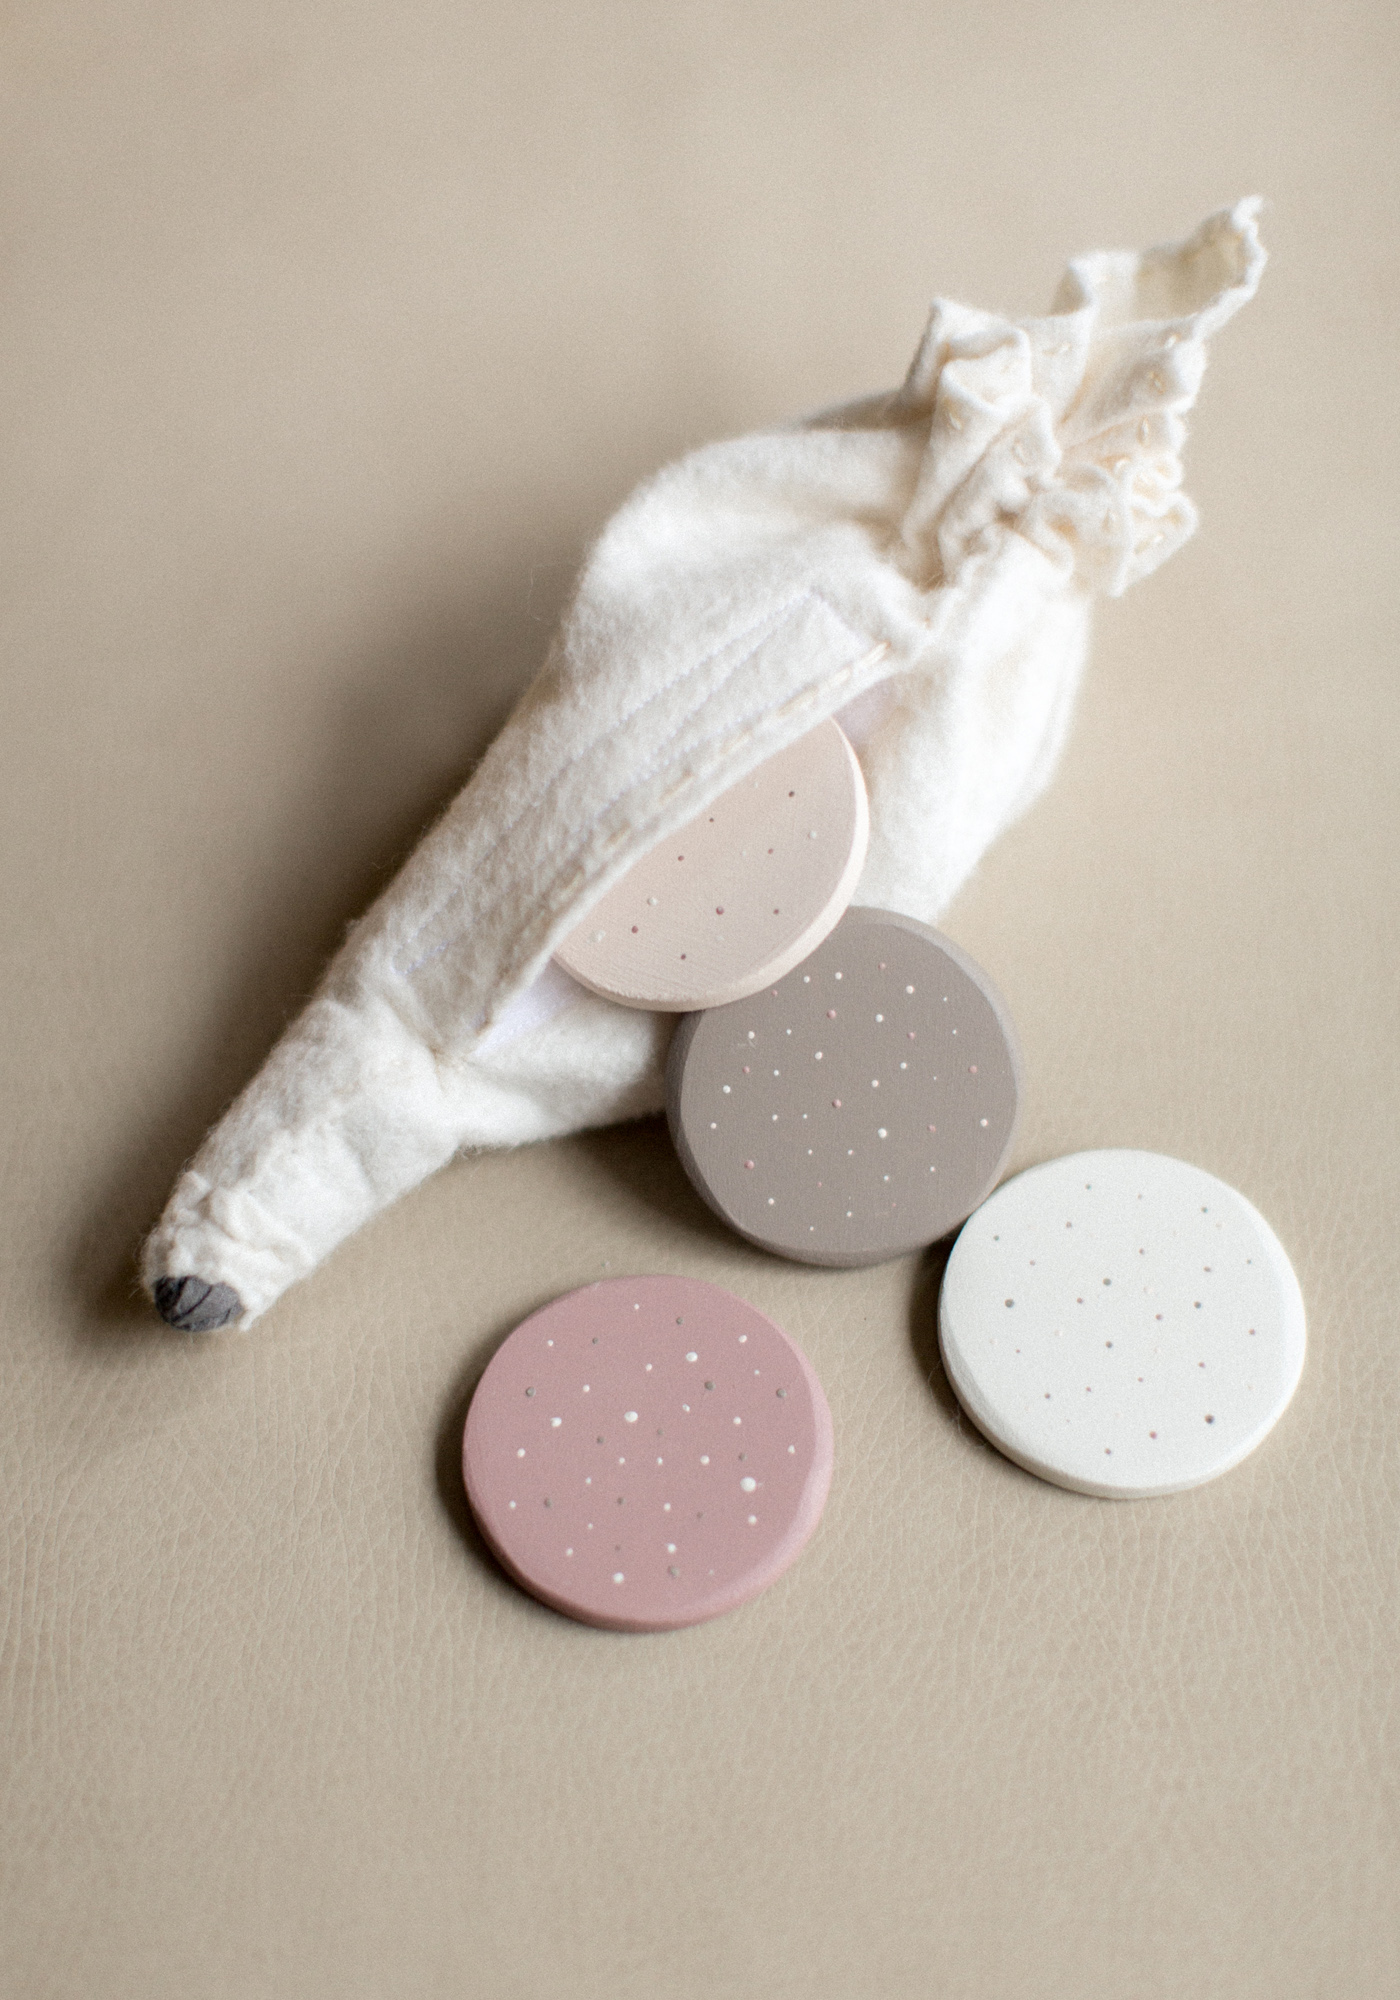
– For the icing, I removed as much of the existing color as possible, using an electric sander (down to bare wood for the most part). Since the pieces are smaller, I held the sander upside down in one hand, and moved the icing pieces (one-by-one) around on top of it. Gloves might be helpful in ensuring you don’t sand your fingertips. Note: I don’t love how the paint dust discolored the velcro, but I figure the color will wear off eventually, and if not, it’s a small price to pay to ensure longevity/paint adhesion.
– I also deliberately took down the edges of the wood in this process. The icing circles come with a “hard/perfect edge”, and I thought the uneven edges would be a bit less commercial, if that makes sense.
– For the knife, I simply sanded by hand. I tried to take off as much color as possible, but the primary concern here is removing the sheen so that your new paint sticks. If you look closely, you can see where I scuffed the “blade” (which I did not repaint) in the process. Oops. Oh well, I’m sure it won’t be the only ding or scratch this set encounters.
Paint
– I came across this line of paint* a while back while doing research on non-toxic, zero VOC paints for exactly this purpose – making over toys. I’ve used it on quite a few projects, and so far am super impressed with its durability! My two toddlers are rough on toys. They are one year olds. They chew, slobber, bang, and throw – as toddlers do. And thus far (I first used this paint back in March 2020), anything I’ve painted hardly looks touched… i.e. outlasting than the painted wood toys I’ve left as-purchased.
* NOTE: Please do your own research. This is not advice about which paint you should use, simply what I am comfortable using for my kids.
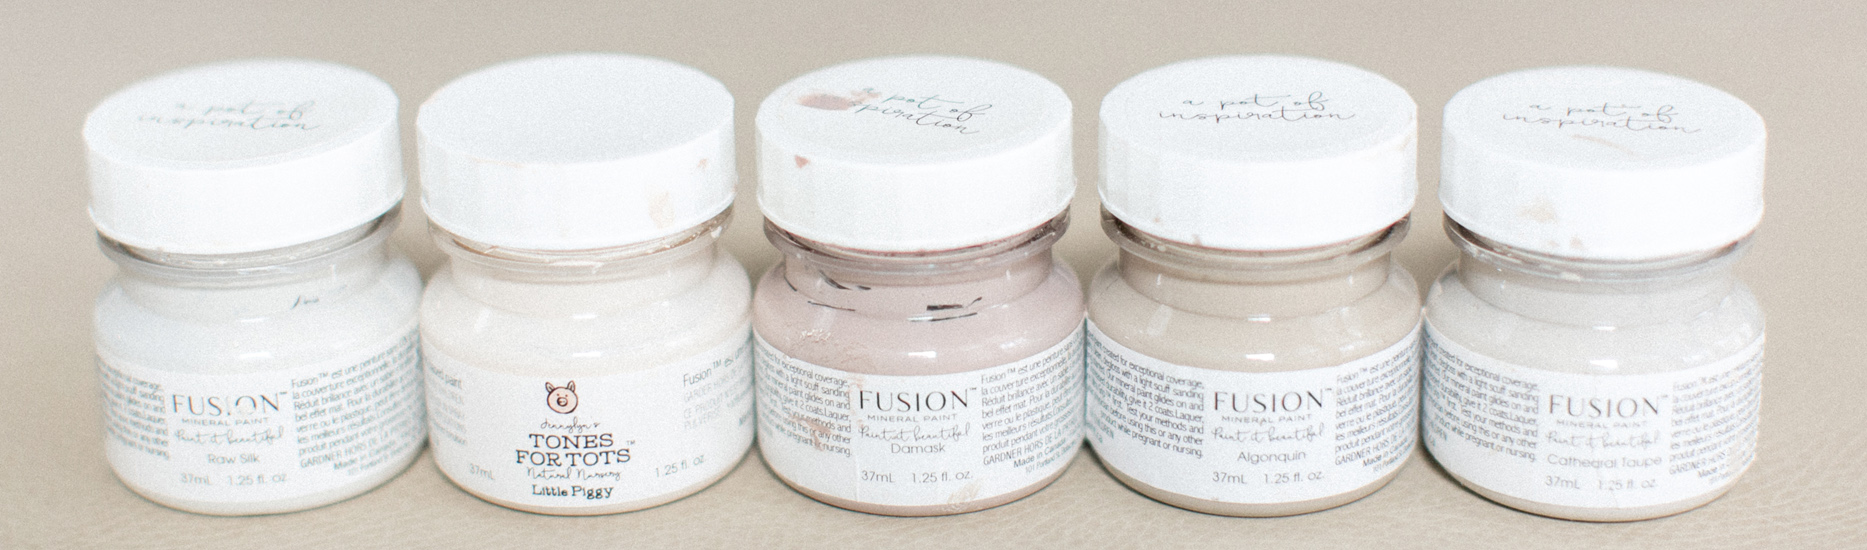 That being said, here is a bit more information. There are a few specific colors in this line – “Tones for Tots” -that are certified safe for toy use. This means they’ve gone through testing (and paid a lot of money) to acquire that specific stamp of approval. I spoke with a sales rep about this, and was told that all of the colors use the same formula, but not all of them have gone through the certification process due to the added expense required for each individual color. That was good enough for me. Again, do your own research to find something you are comfortable with.
The sample-sized paints are perfect for small projects. I’ve used these over and over again, as is made evident by the condition that they’re in.
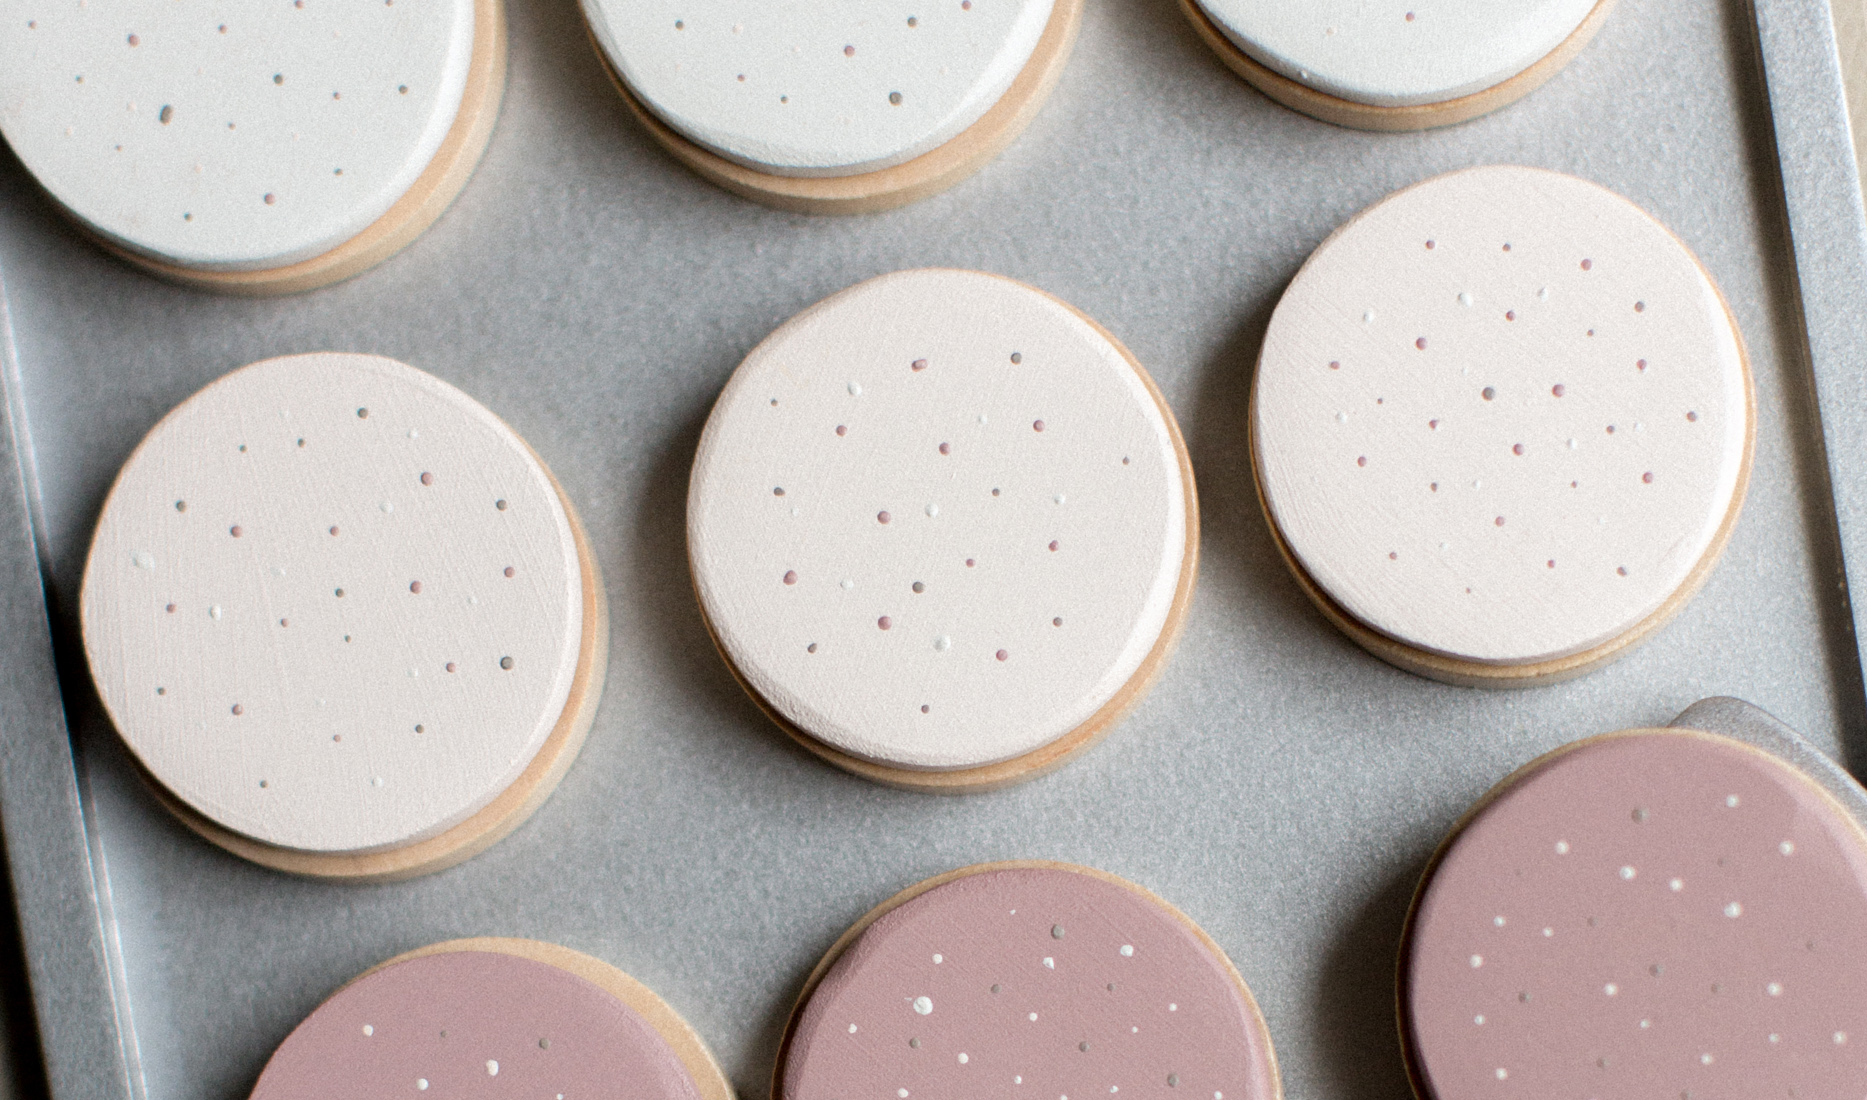
For reference, the colors used in this project are, for the icing: Raw Silk, Little Piggy, Damask, and Algonquin. For the knife handle: Cathedral Taupe.
I gave each piece 2-3 coats, watering down my brush slightly on the last coat to give it a more smooth finish.
Lastly, I added the little sprinkles using a needle, and alternating through the same paints I’d used for the icing.
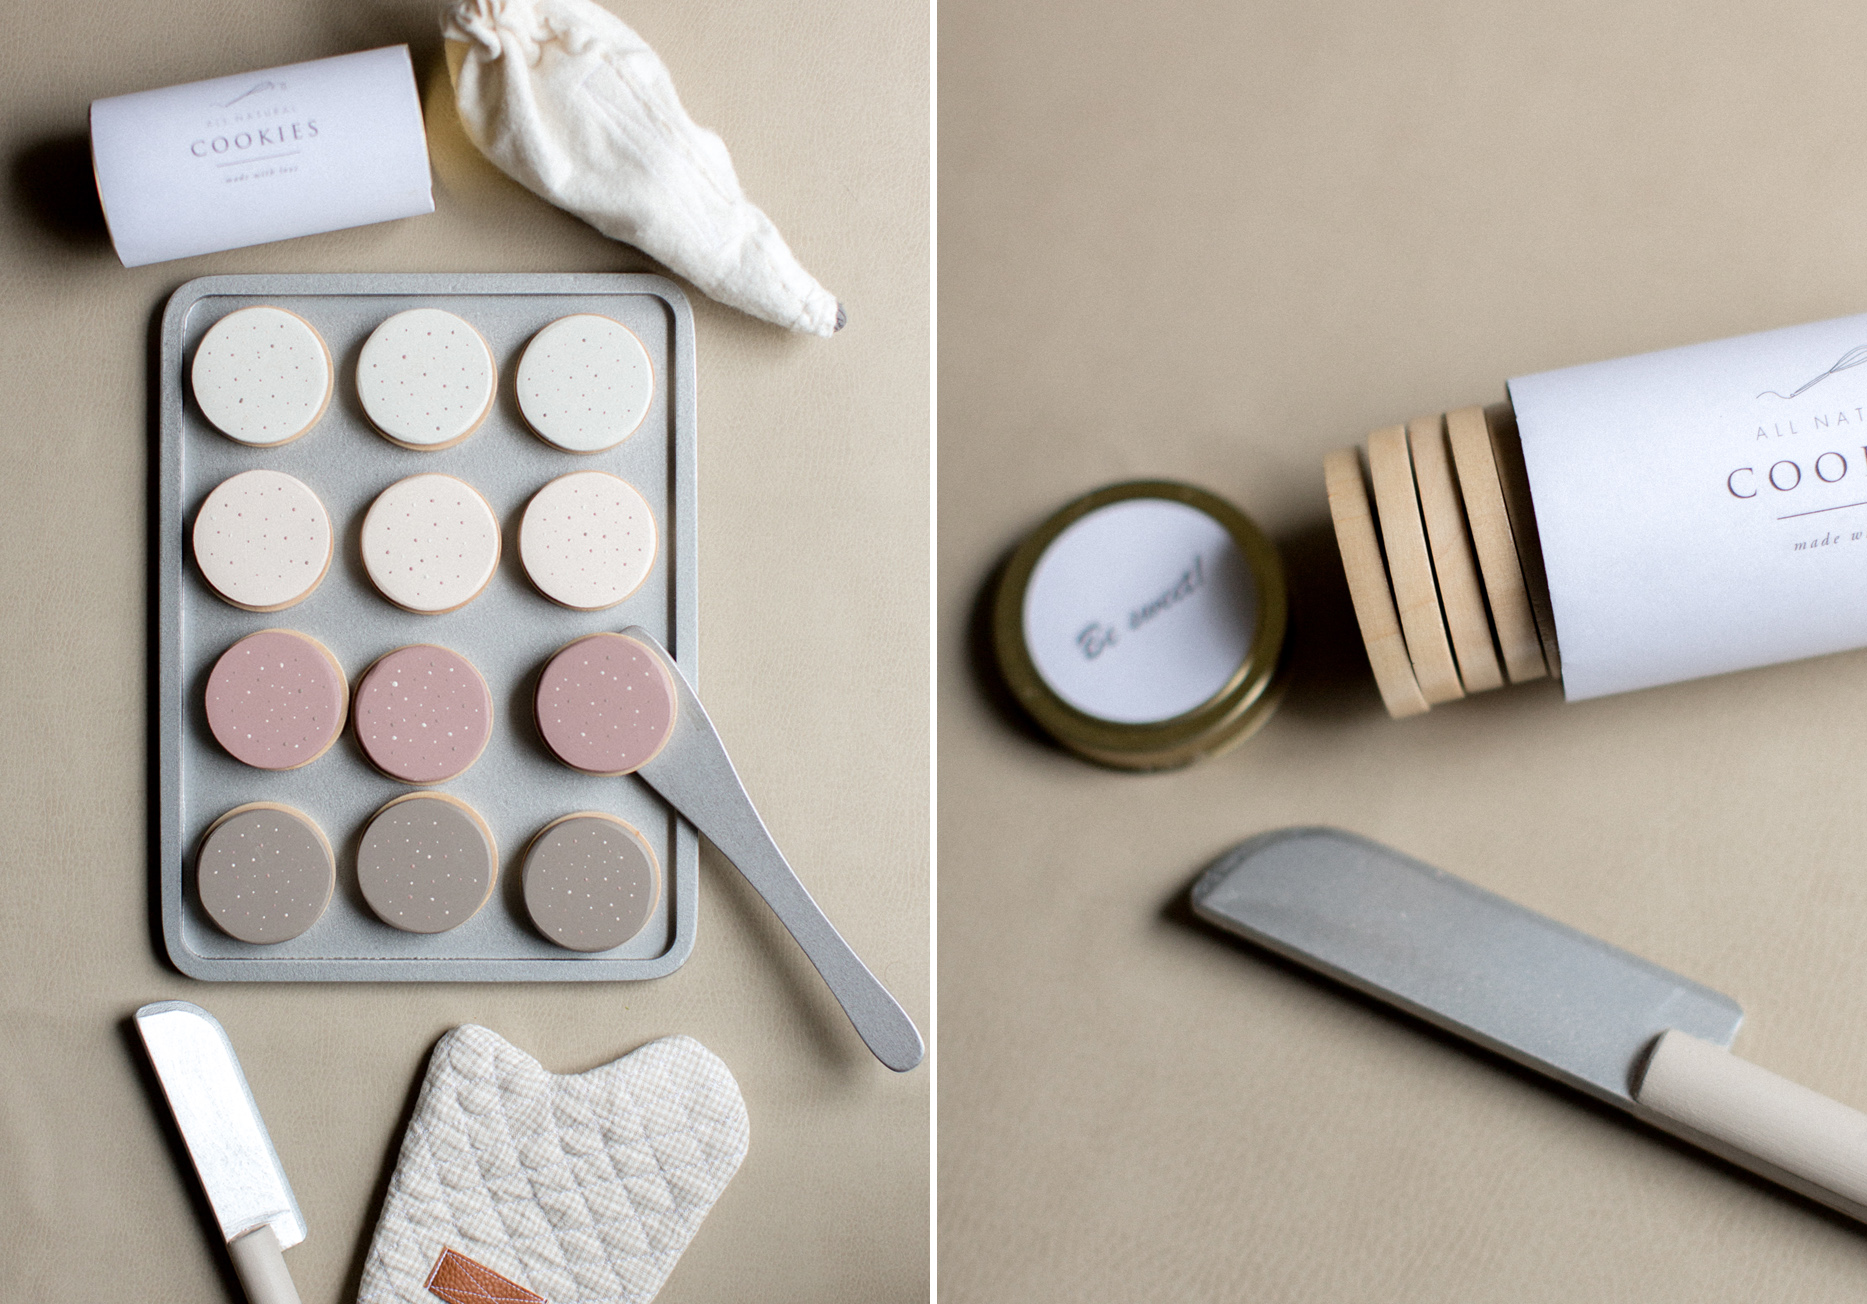
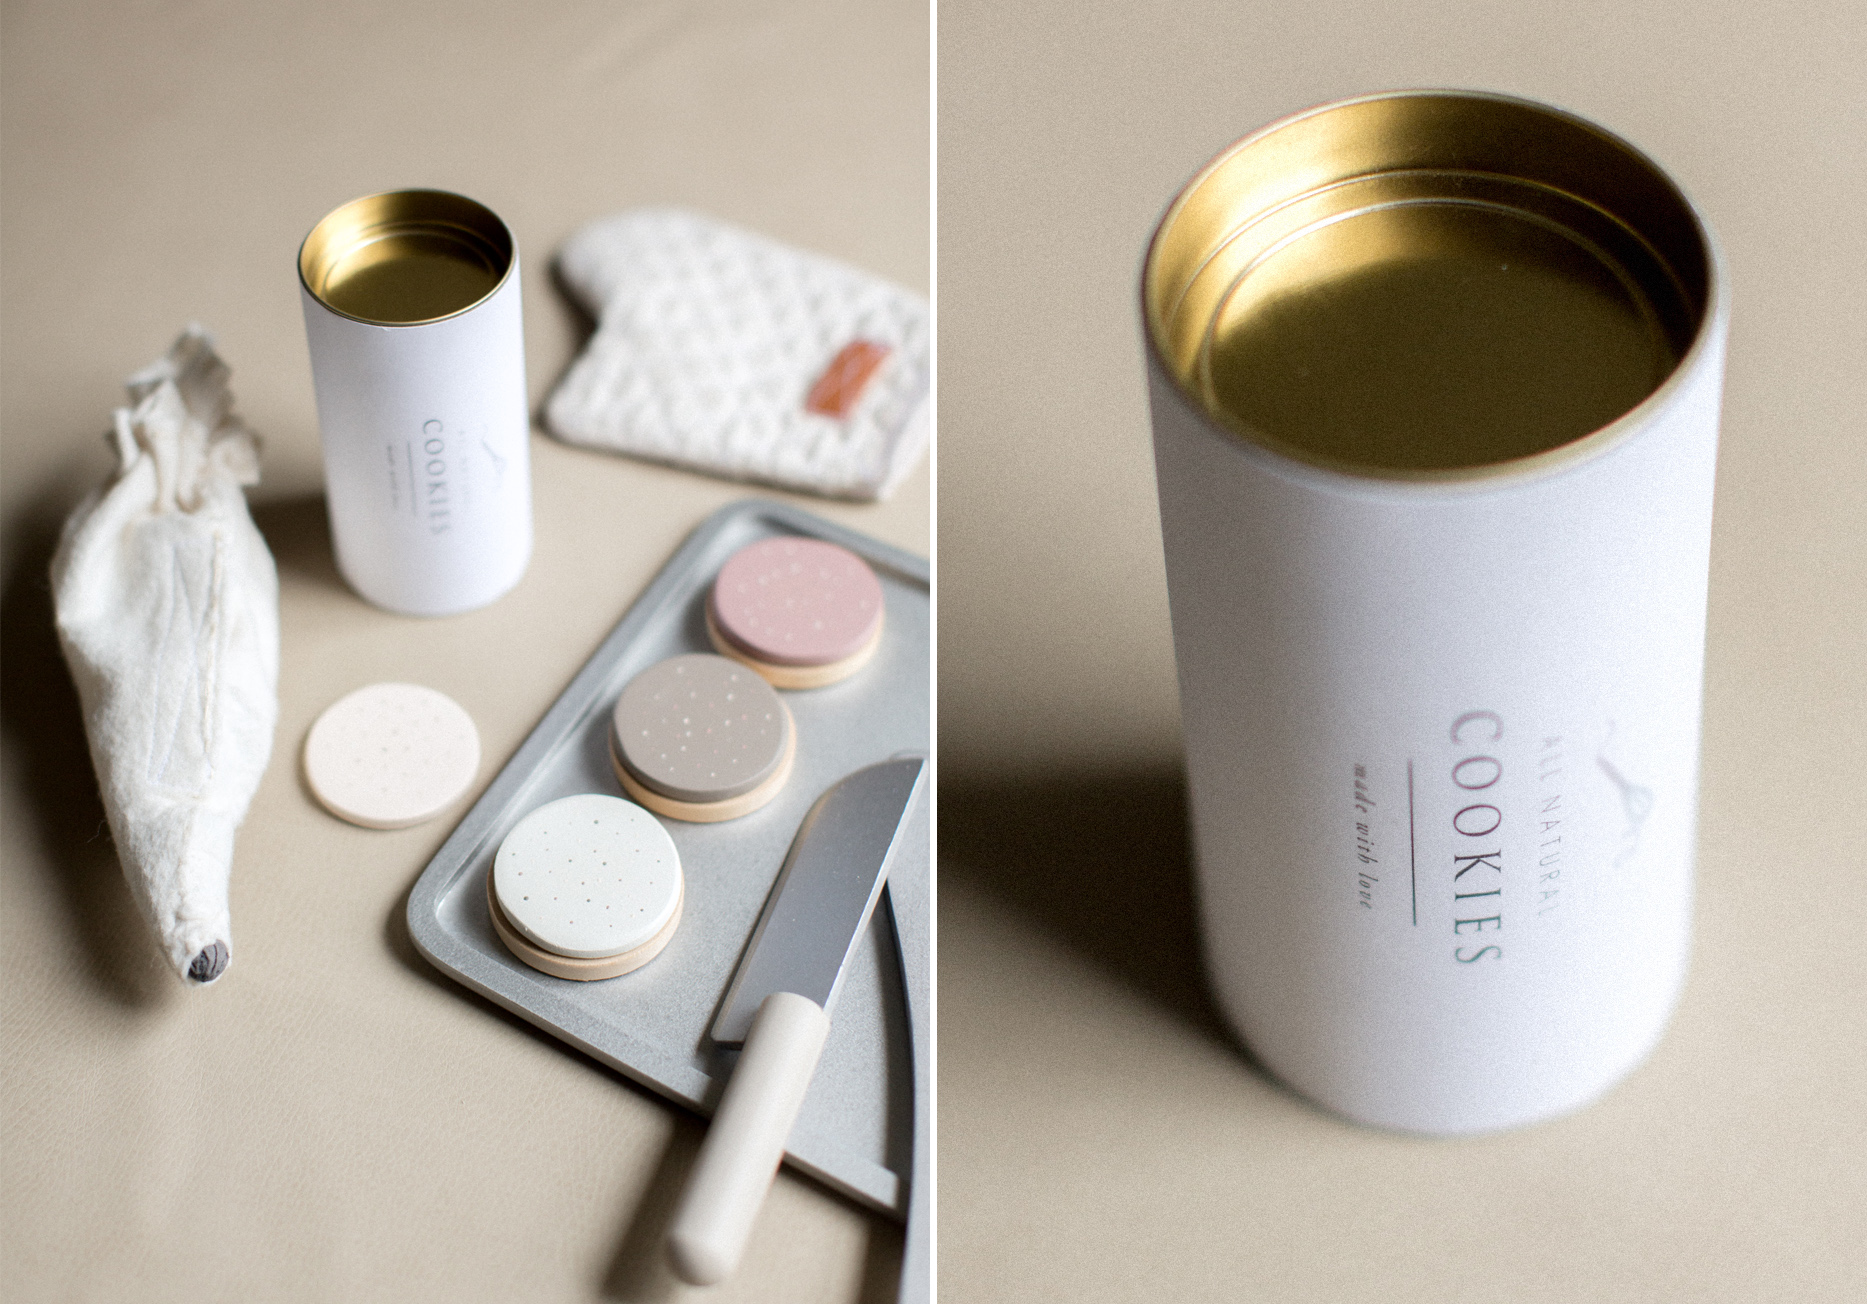
02 :: COOKIE TUBE
– Using a utility knife, I cut down the cookie can to fit just the “cookies”. Notice that the end pieces need to fit into the tube as well, so be sure to allow for that in your measurement. (I ended up cutting off 2 3/4″.)
– I lightly sanded down the label, assuming it would show through the white sticker I planned to use. The surface was then too “soft” for my sticker to adhere to (sigh), so I lightly spray painted it with a primer that happened to be sitting in the garage. This did the trick.
– I designed and printed a new label on white sticker paper, cut it to size, and carefully stuck it to the tube. I then hung it with a stick, sprayed it with a light clear coat and allowed to dry. (I may end up adding a shellac finish to this piece in the future for added durability.)
– My plan was to spray paint the end pieces of the can, but as I was working on this step, I literally just happened to have a gold tin lid from a candle sitting nearby and noticed it was about the same size. Scratch that. It was the exact. right. size. Lucky for me, I had two of these candles pretty much completely burned out. So I grabbed the other lid as well, and hot-glued one in place, leaving the other side open-able.
03 :: FABRIC ACCESSORIES
Oven Mitt
– I made an entirely new oven mitt using the included one as a pattern. I just kept the included red and white one as-is to have out at Christmastime. (It goes nicely with this precious set of Christmas cookies – given by Grandma – that the girls are currently playing with.)
Piping Bag
– I hand-stitched a felt piping bag to store the icing pieces that no longer fit in the can. I did end up using a machine for the closure, but in hindsight, would probably forgo that step all together, and just have it close with a string. I’m considering making a second just to test that method, and if I do, will try to make a tutorial.
One final note… Projects like this are really more about having an outlet for my creative energy than it is a necessity to have the perfect set of play cookies. Yes, I tend to seek out stuff that is, amongst other things, visually appealing. But the process of creating is a form of self-care for me, so sometimes, in this season of life with two littles and not much time for the everything else, I let the sink sit full of dishes while I do something for myself. ;)
If you have any questions, please don’t hesitate to send them my way.
Hugs,
m